
Images add so much life to your website, but too many images can create a mess and overwhelm your visitors. Luckily, there’s a simple solution named ‘image carousel’.
With an image carousel, you can elegantly arrange your images, and enhance user engagement, making your website more captivating and convenient.
Throughout this blog post, we’ll guide you through how to create image carousel in Divi, making your website visually appealing and user-friendly.
So get your images ready and start right away!
Prerequisites
But before we move forward with the process, we need the updated Divi theme and an image carousel plugin just because you can’t make an image carousel using the default Divi modules.
We will use Divi Carousel Module 2.0 – a featured-packed Divi carousel plugin that lets you create a beautiful image carousel in minutes.
Also, you can customize it with tons of customization options to make your carousel look exactly how you want.
So, here is the summary of the prerequisites –
- Install the latest Divi theme version from their website
- Install the updated version of the Divi Carousel Module 2.0 Plugin
Step One: Staring with Section, Row, and Module
Before stepping in, we have to remember that our image carousel creation be done by adding a page or starting with an existing page.
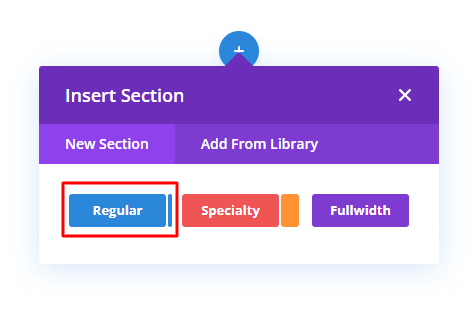
Add New Section
Now, we are into the image carousel creation through the Divi visual builder. Here to add a section, simply click the blue (+) icon. Select the regular section and head to row addition.
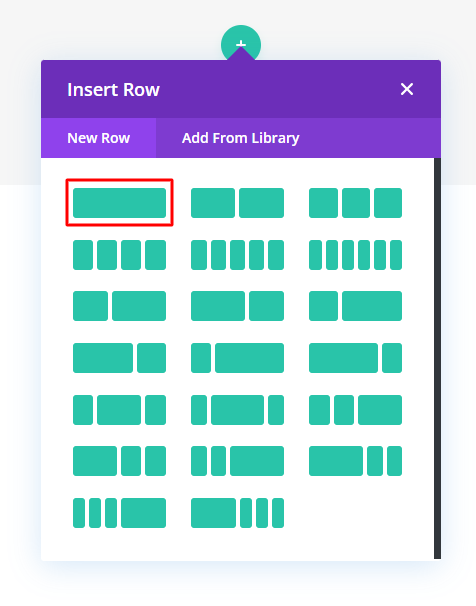
Add a Row
Here, to add a row, click the green (+) button and select a single row to continue.
Here a small settings to change.
To make it a full width, Go to the Row Settings > Design > Sizing and change the –
- Width > 100%
- Max Width > 100%
The purpose of this change is to make the carousel look better.
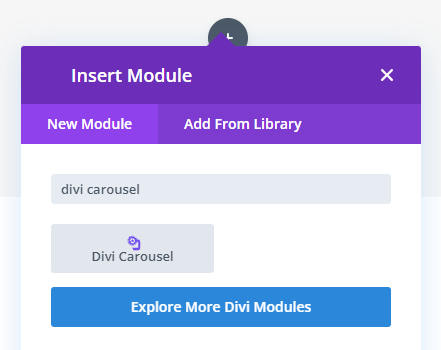
Add Divi Module
Then click the grey (+) icon and search for ‘Divi Carousel’. Select that module to design your content.
Note: Though the section and row have many customization options, we are skipping these to give you a simpler image carousel technique. You are always welcome to explore more.
Step Two: Add Image & Content
After inserting the module, we must place the content to make it a carousel. Simply click the grey (+) icon named Add New Item to continue.
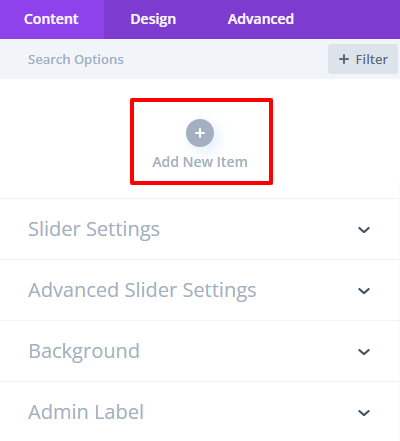
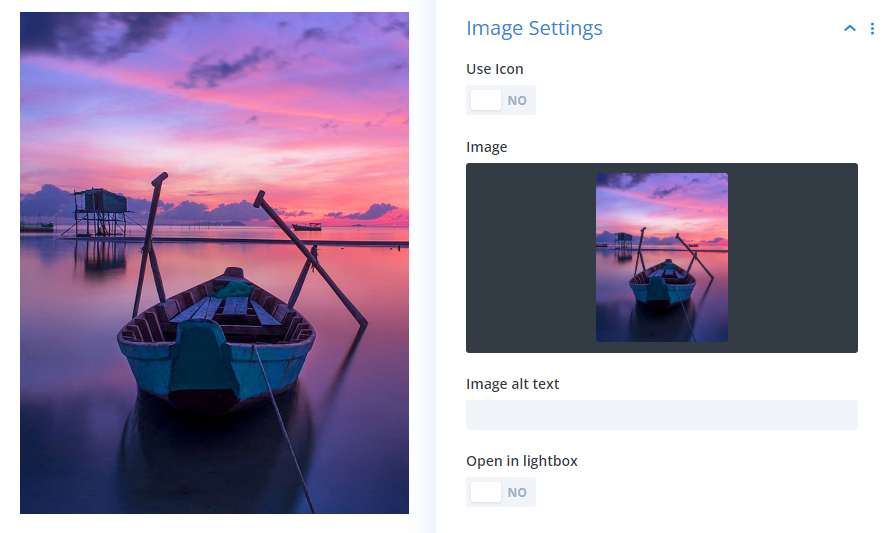
Adding a new item will take you to the child item content settings. Here, we need to make two simple changes to add an image.
- Scroll down a little bit and click on the Image Settings option
- Now, add an image by clicking the grey (+) Add Image icon
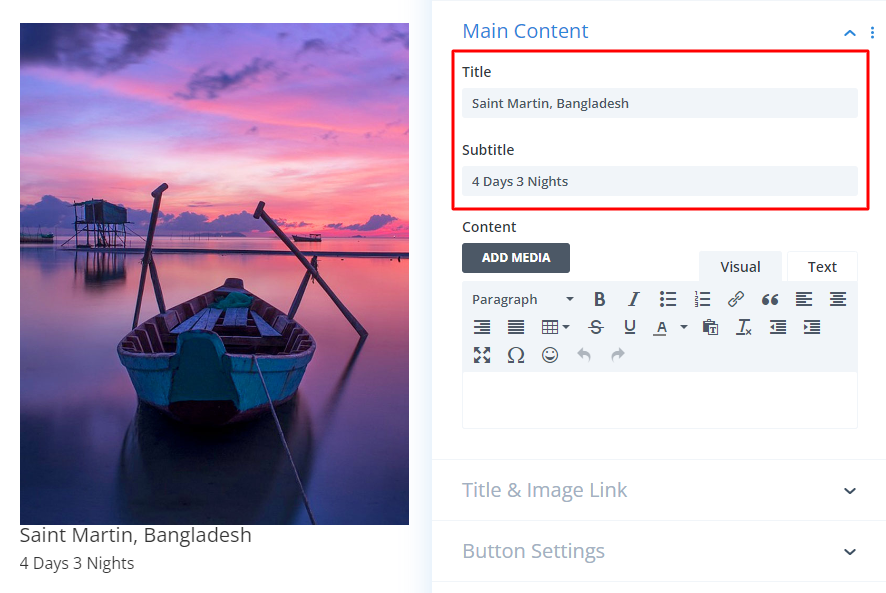
Now, back to the Carousel Item Settings and head to the Main Content to give this image a title and subtitle.
Step Three: Multiple the Image
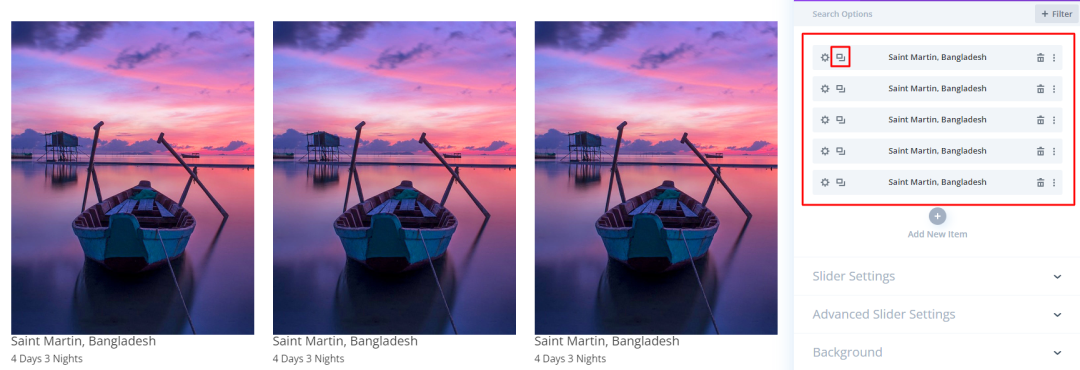
The initial step for adding an image has been completed. Now, it’s time to multiply it.
Just get back to global settings. Select the copy button of the child item to multiply the item according to the number you want.
Adding Content to the Duplicate Items
It is now time to update these items’ images and content.
As we take five items, we have to make five modifications. Click the item settings (⚙️) icon and simply follow Step Two to continue.
Step Four: Design the Carousel Appearance
Up to step three, we have seamlessly integrated our main content to showcase it as a dynamic carousel. Next, it is time to get to work on the design.
For customizing our carousel’s look and feel, let’s navigate back to global settings.
In this phase, we will focus exclusively on the Content and Design tabs, since the Advanced tab requires coding expertise.
Nonetheless, feel free to explore customizations, as you have complete authority over the design.
Global Content Customization
As we work through the Content tab options, we’ll begin with the Slider Settings. Simply do the following –
- Specify the number of images displayed on the carousel by entering a value in the Show Item Desktop field. You can also adjust this value separately for tablet and mobile devices.
- Then, turn these buttons ON to make this a carousel – Center Slide, Loop and Arrow Navigation
Note: You can find here various slider options to change. Explore and customize your own to give your Divi image carousel a new look.
Fine-tune the Image Carousel
Let’s elevate the appearance of our image carousel with a few subtle adjustments in the Design tab
Soften the edges:
Go to the Image Border and add a subtle curve to the image corners by setting the Image Round Corners to 10px
Align text with images:
Since it’s a carousel, the text should be close to the image. Adjust the Content Container Margin and Padding in the Custom Spacing > Container section to achieve the desired spacing.
Customize text styles:
- Go to Title Text and adjust the font, style, color, and other settings to your liking.
- Repeat the process for Subtitle Text using your preferred settings.
Color adjustments:
Head to Color Settings and personalize the colors of different elements to match your design.

All set!
Click ‘Save Draft’ and leave the visual builder to see your beautiful creation.
Remember, the Design tab is a treasure trove of possibilities. Don’t hesitate to explore further to unleash your creative vision!
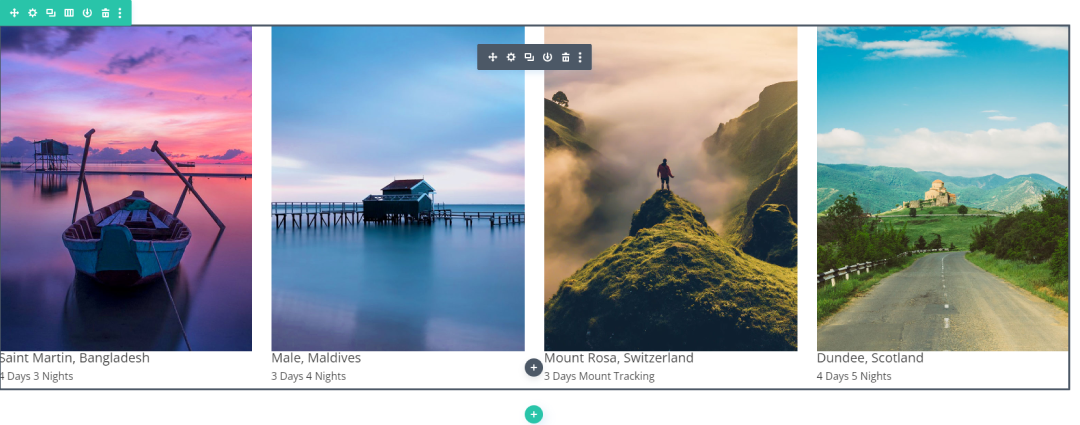
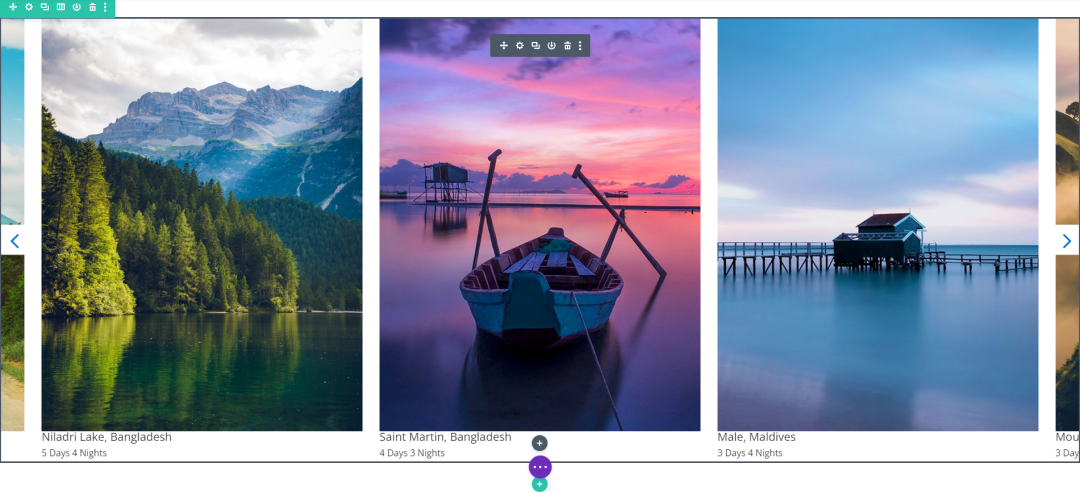
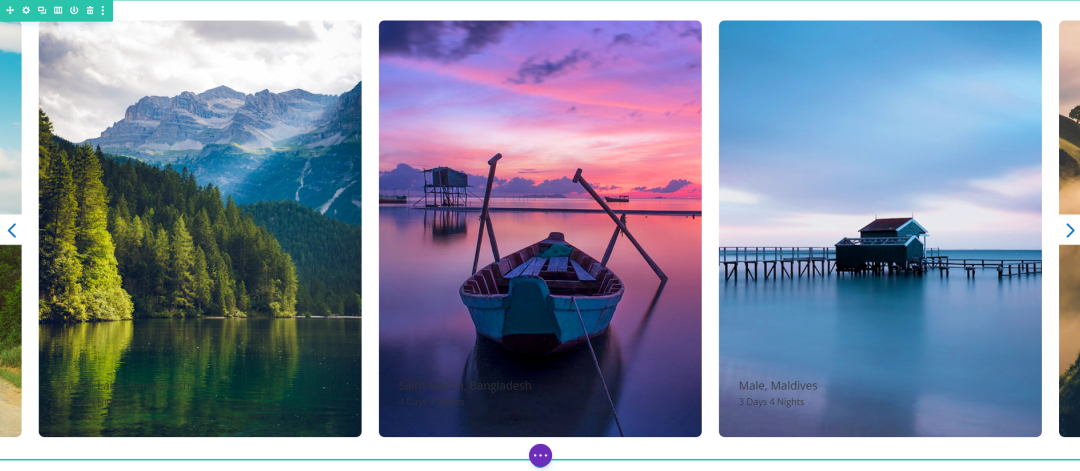
Preview
That’s it.
Let’s have a look at what we made!
We offer some exceptional ideas if you’re looking for design inspiration.
Closing Thoughts
We started this tutorial by saying that creating image carousel in Divi is super easy. Now what do you think?
Quite difficult or easy?
Even though there are several options for making an image carousel. But Divi lets you achieve this most efficiently.
So, follow our most convenient method to make image carousel.
Feel free to use the comment box below if you have any further questions regarding how to create image carousel in Divi. Your queries are always appreciated.


0 Comments